Vertical Slides
Your slides are stepped between using a horizontal sliding transition by default. These horizontal slides are considered the main, or top-level, slides in your deck.
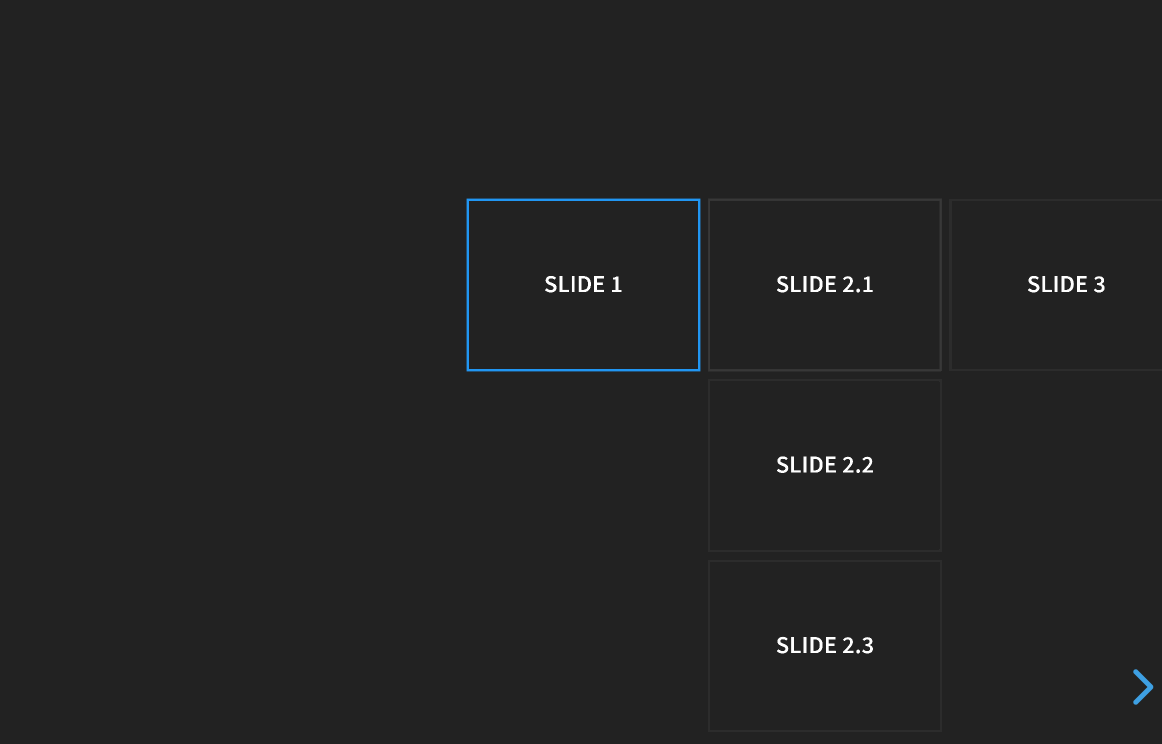
It's also possible to nest multiple slides within a single top-level slide to create a vertical stack. This is a great way to logically group content in your presentation and makes it convenient to include optional slides.
When presenting, you use the left/right arrows to step through the top-level (horizontal) slides. When you arrive at a vertical stack you can optionally press the up/down arrows to view the vertical slides or skip past them by pressing the right arrow. Here's an example showing a bird's-eye view of what this looks like in action.
Markup
Here's what the markup looks like for a simple vertical stack.
<section>Horizontal Slide</section>
<section>
  <section>Vertical Slide 1</section>
  <section>Vertical Slide 2</section>
</section>Navigation Mode
You can fine tune the reveal.js navigation behavior by using the navigationMode config option. Note that these options are only useful for presentations that use a mix of horizontal and vertical slides. The following navigation modes are available:
| Value | Description |
|---|---|
| default | Left/right arrow keys step between horizontal slides. Up/down arrow keys step between vertical slides. Space key steps through all slides (both horizontal and vertical). |
| linear | Removes the up/down arrows. Left/right arrows step through all slides (both horizontal and vertical). |
| grid | When this is enabled, stepping left/right from a vertical stack to an adjacent vertical stack will land you at the same vertical index. Consider a deck with six slides ordered in two vertical stacks: 1.1 2.11.2 2.21.3 2.3If you're on slide 1.3 and navigate right, you will normally move from 1.3 -> 2.1. With navigationMode set to "grid" the same navigation takes you from 1.3 -> 2.3. |